

How to Add Point of Interest?
Learn how to add point of interest
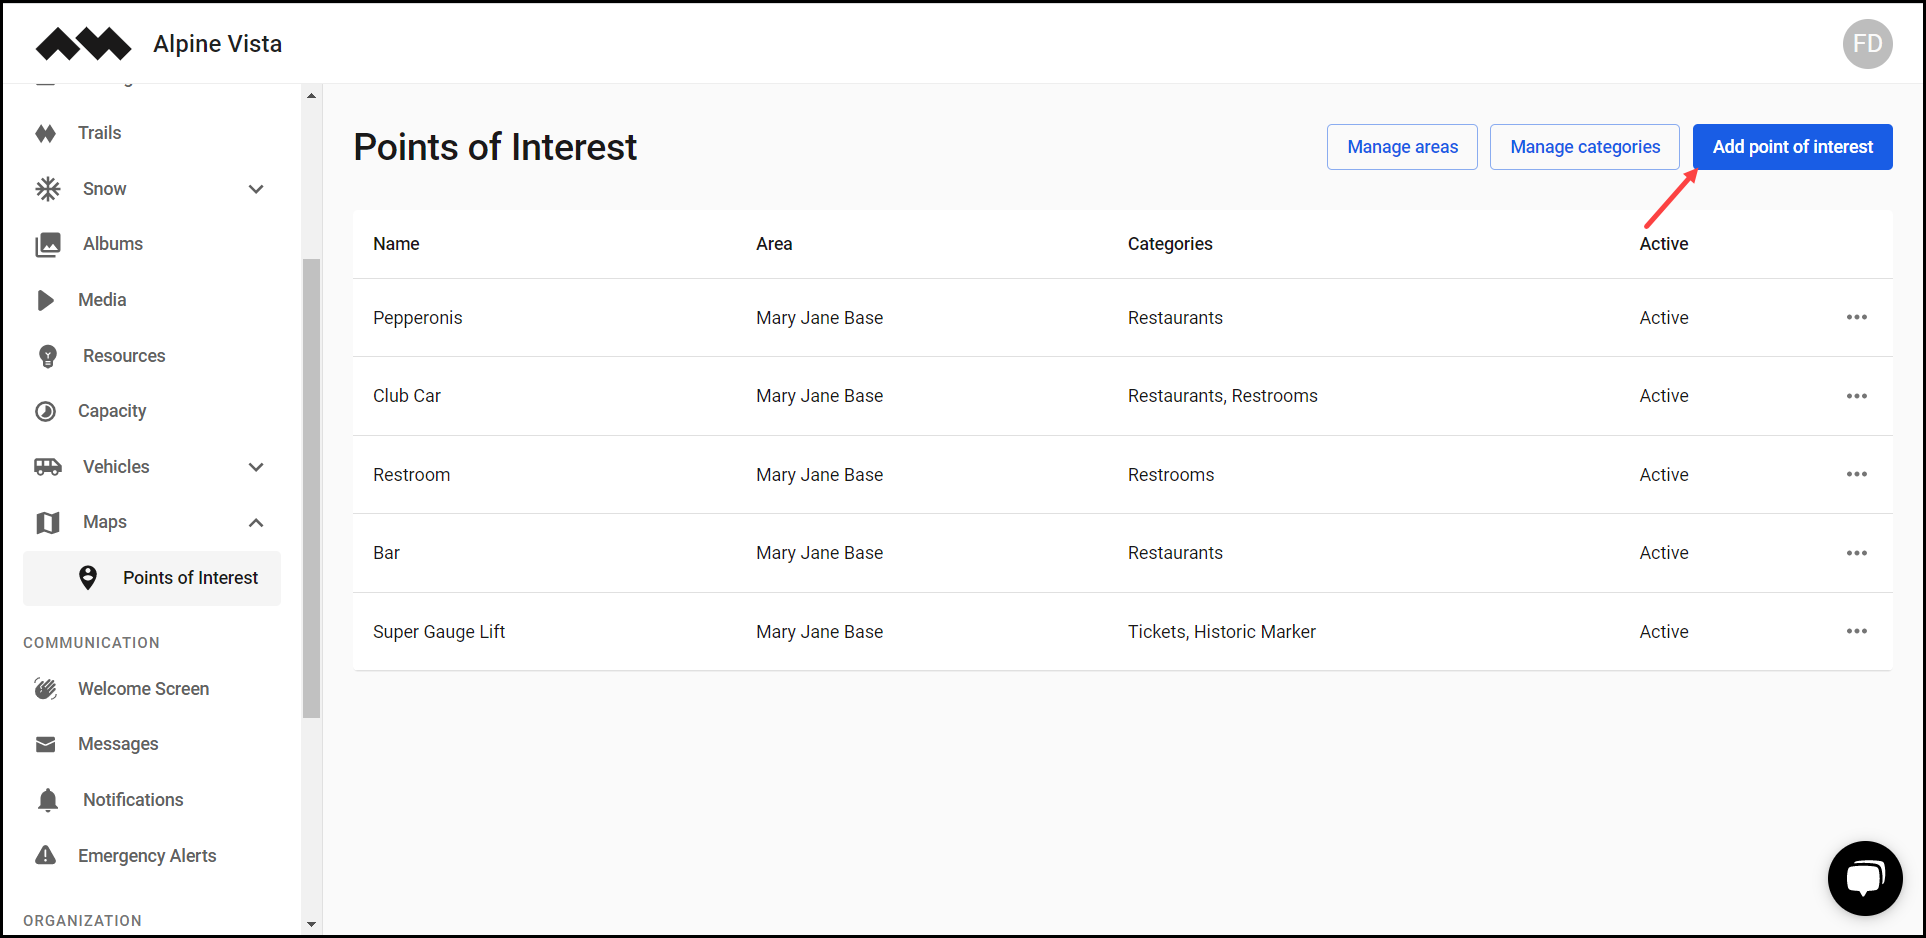
[Organization Name] > Left Navigation Bar > Maps > Points of Interest
1. Follow the workflow mentioned above to land on the Points of Interest screen.
2. Click the Add point of interest button. Doing so takes you to the New Point of Interest screen.
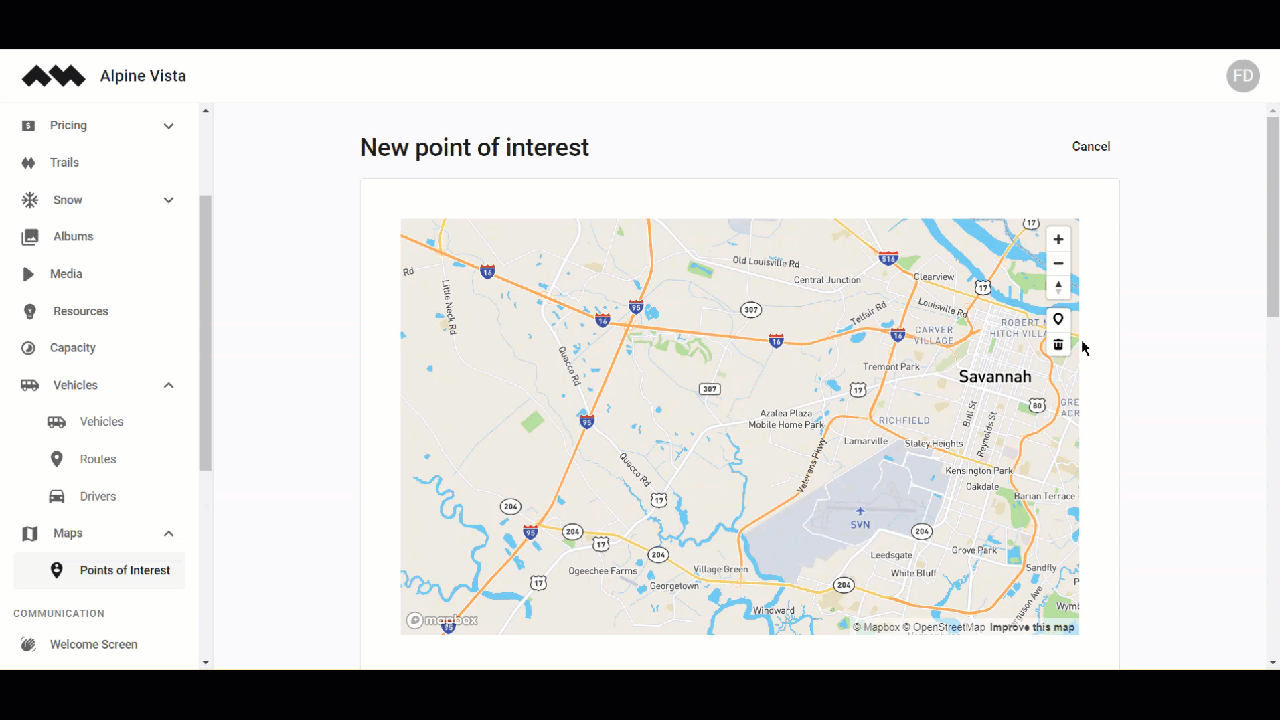
3. Here, use the marker tool from the map view in order to define a point of interest on the map.
4. Use the Name field to name the point of interest you are adding.
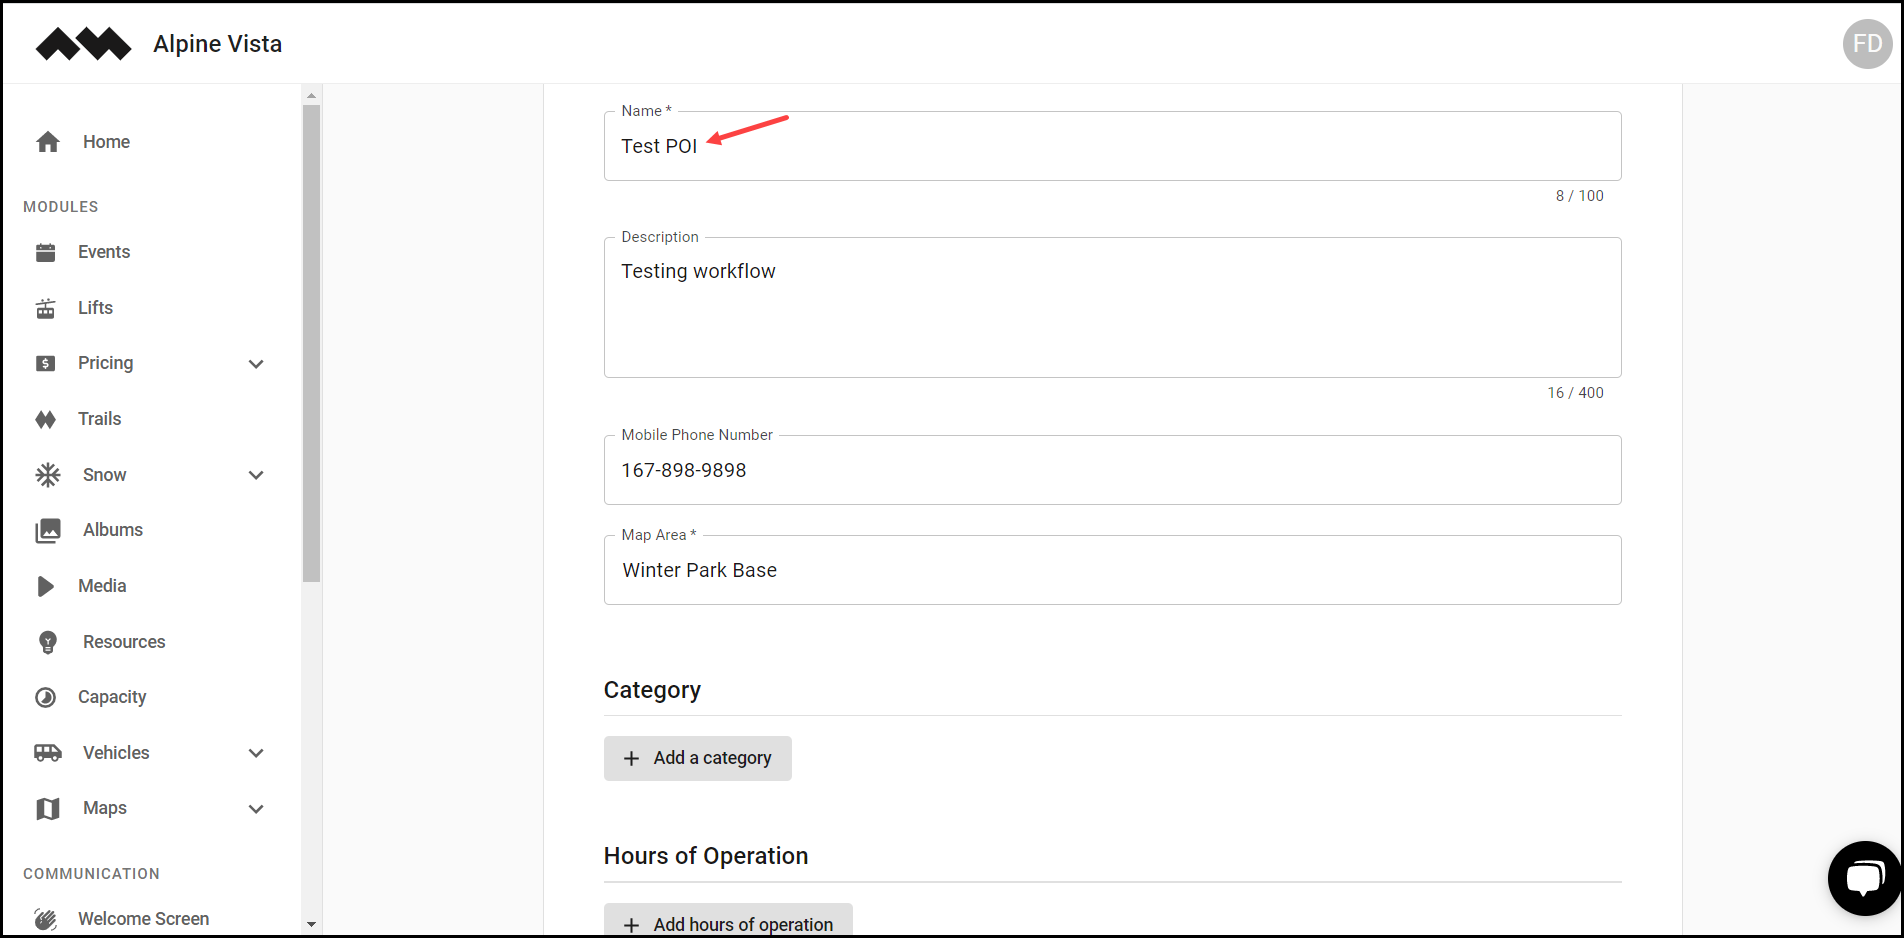
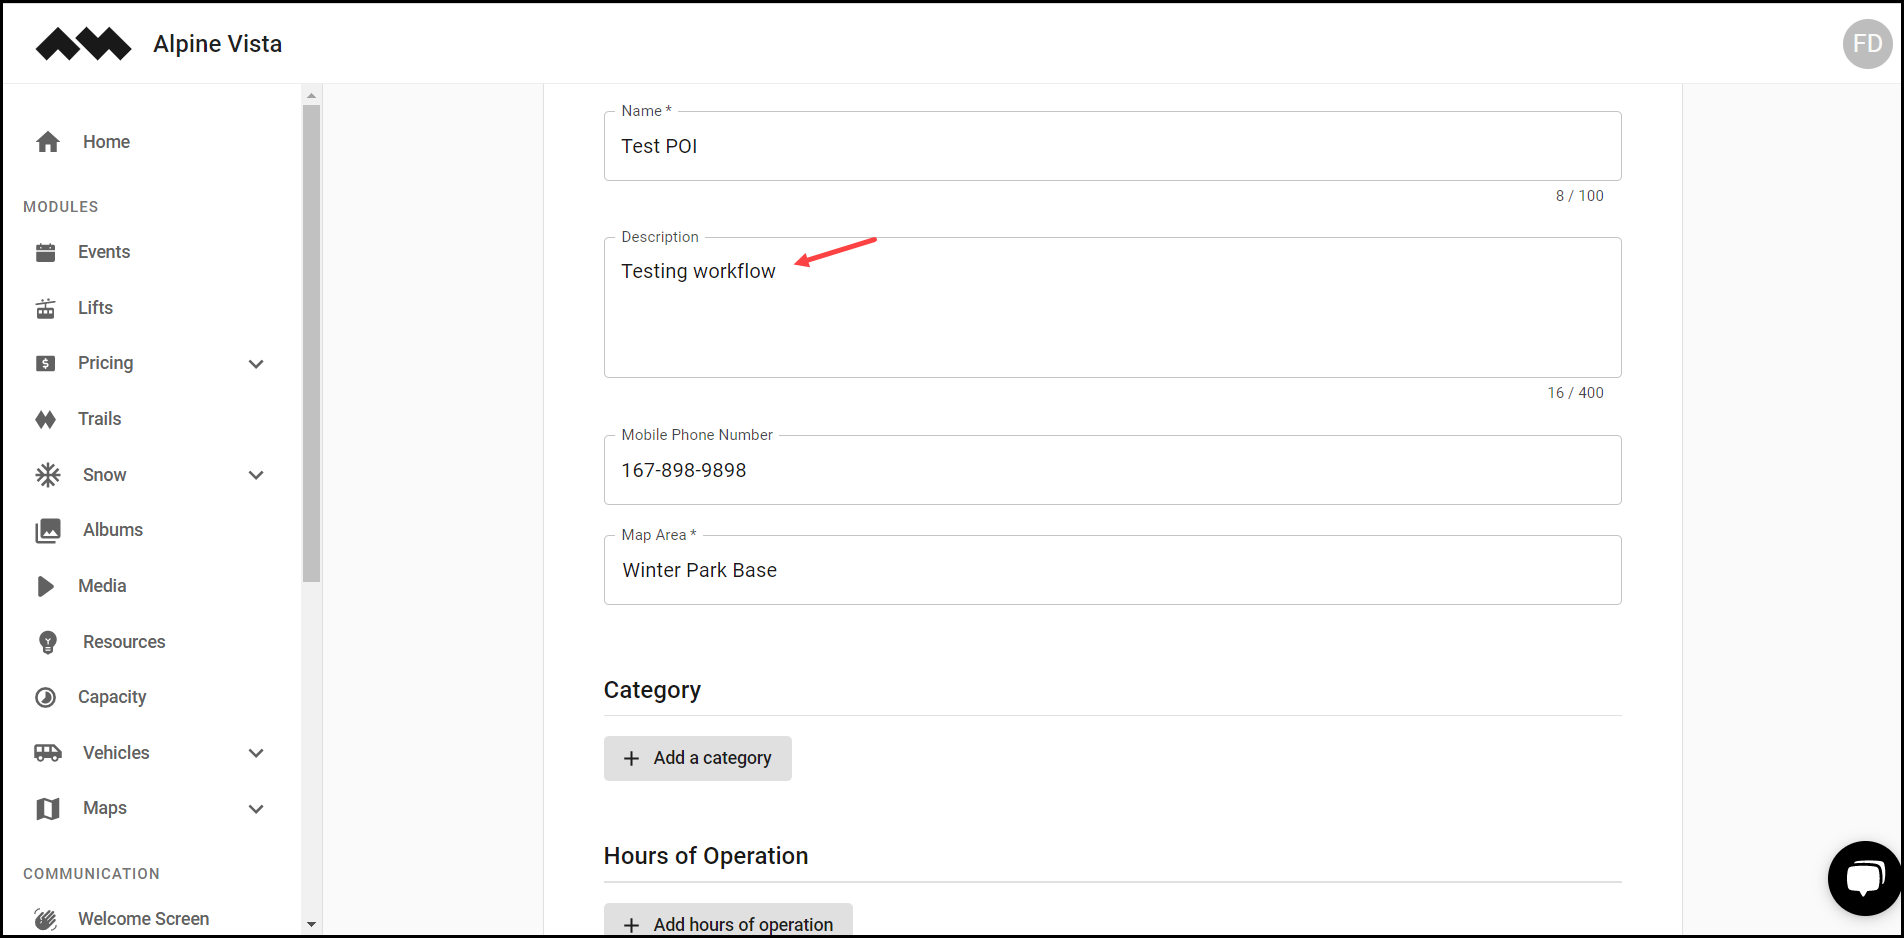
5. Add a description using the Description textbox.
6. Enter the contact number in the Mobile Phone Number field.
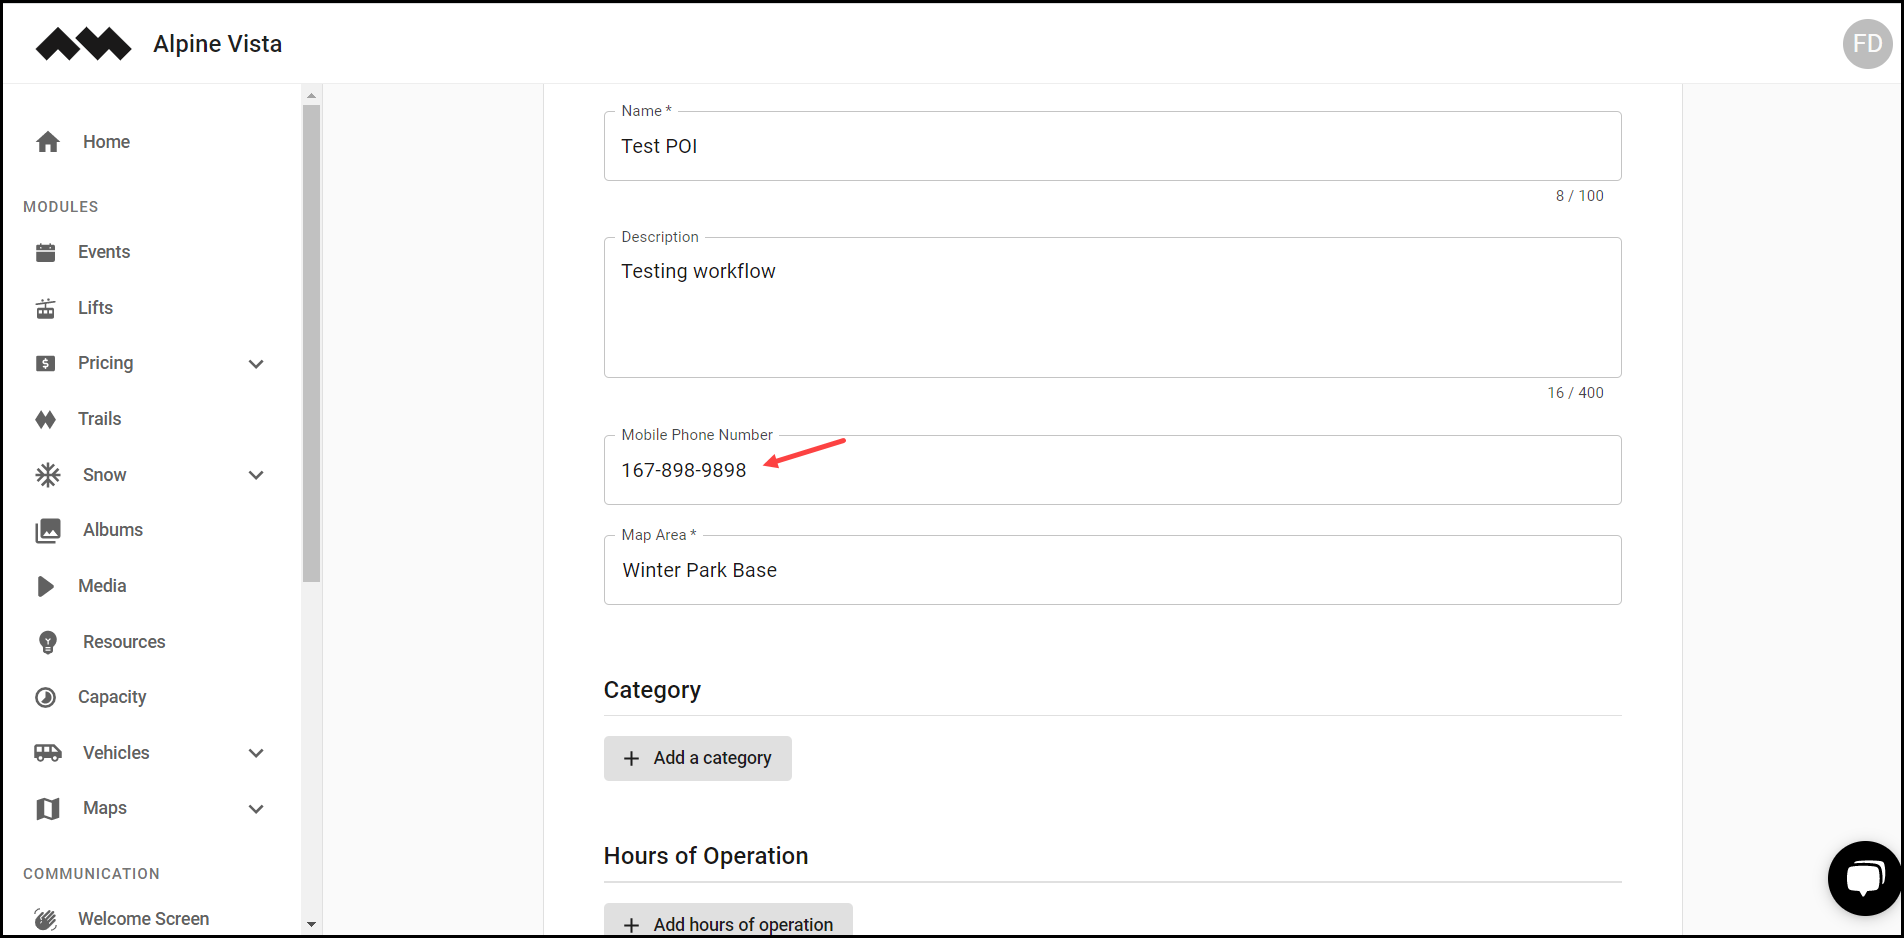
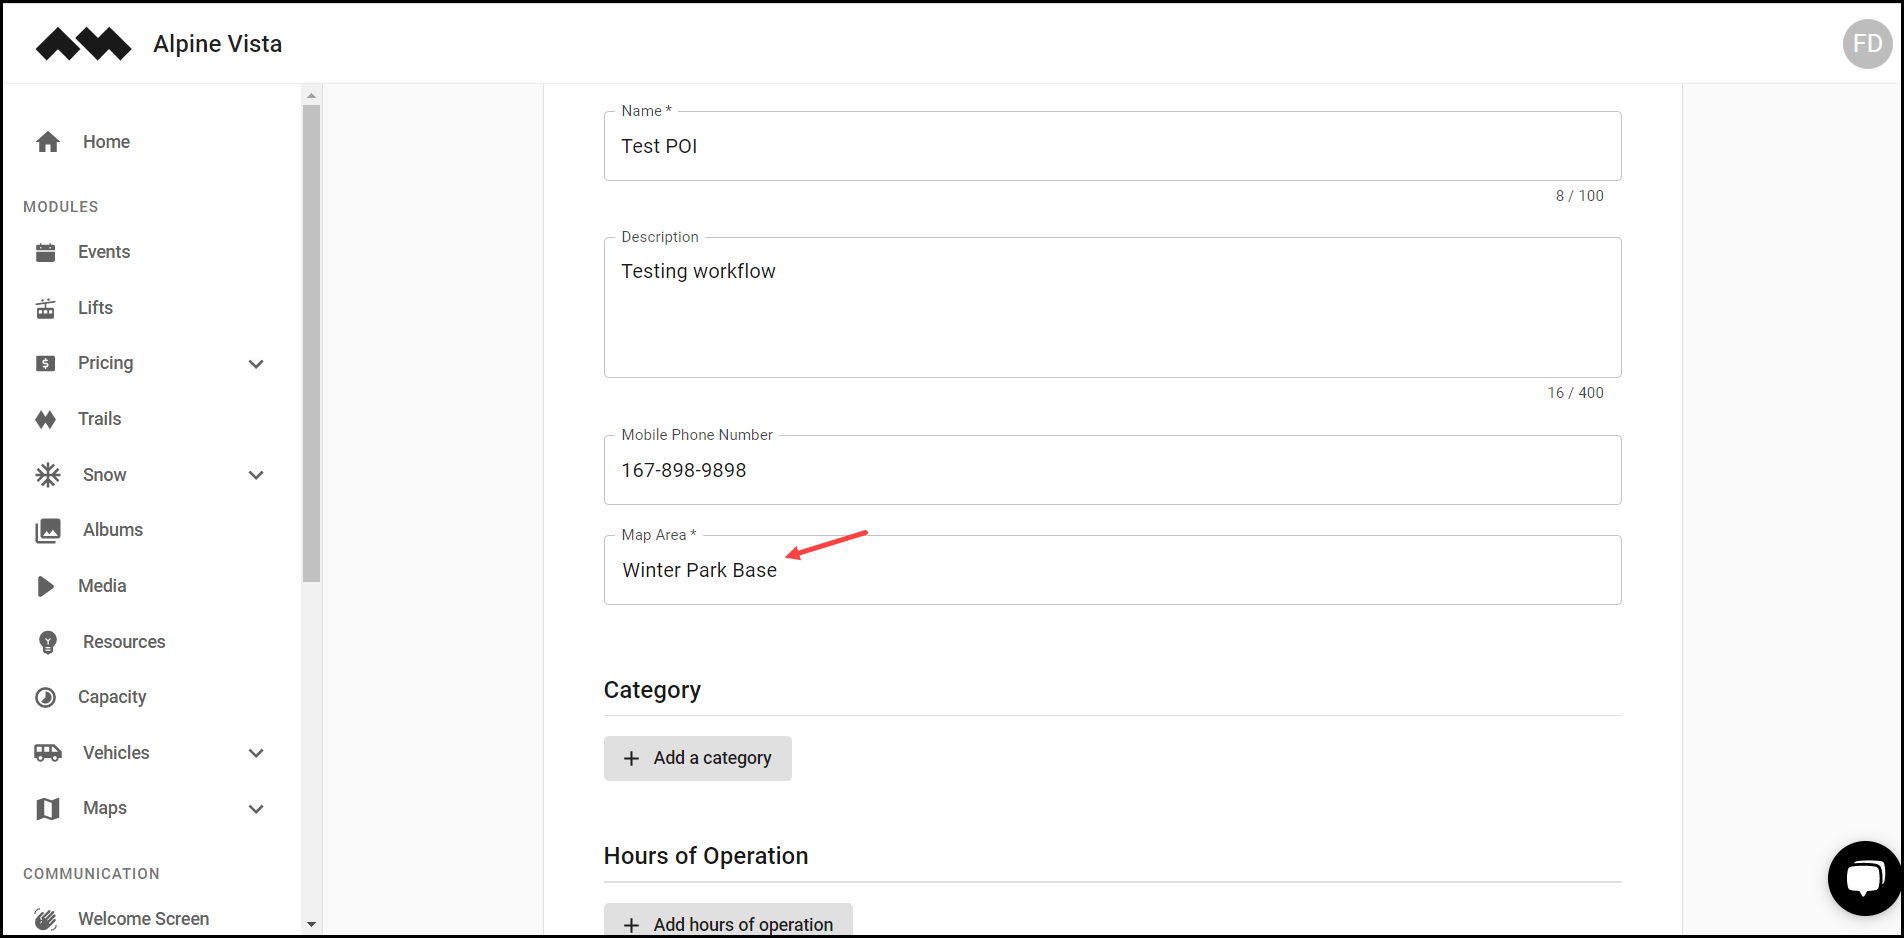
7. Choose the map area using the Map Area dropdown.
8. Click the +Add a Category button to add a category to the point of interest. Doing so reveals the Category dropdown allowing you to select the category.

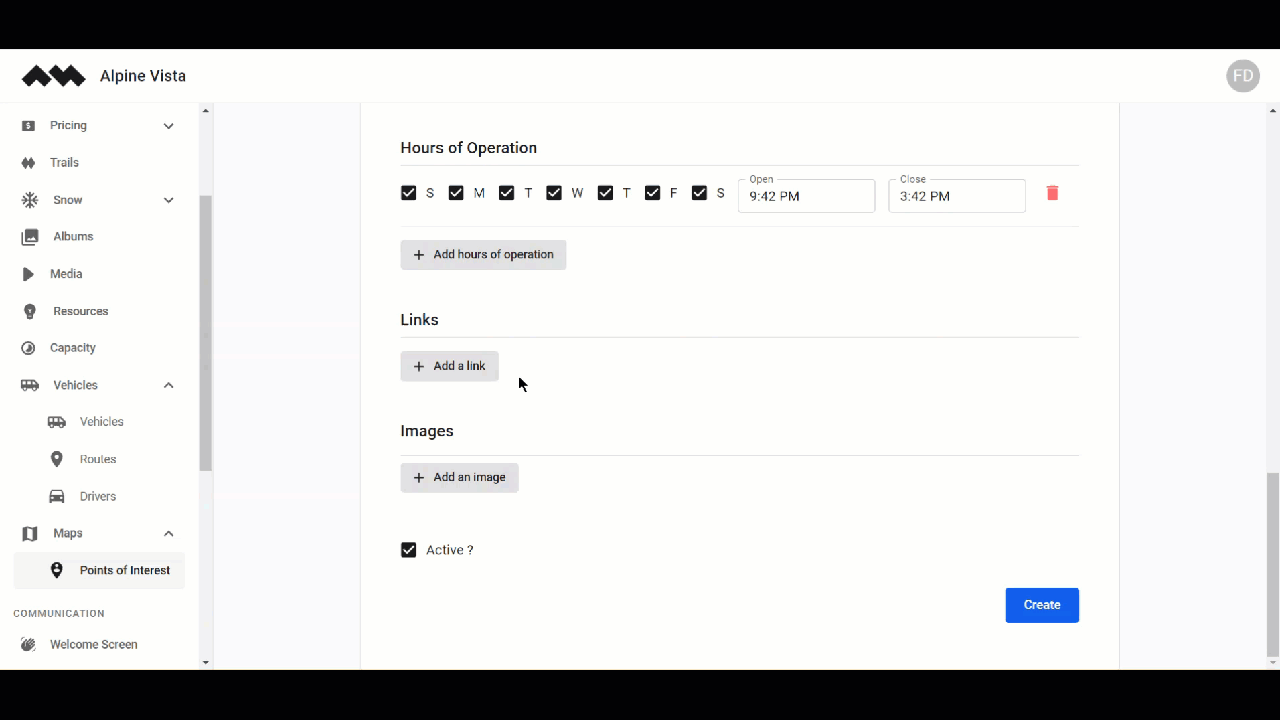
9. Similarly, clicking the +Add Hours of Operation button reveals the day names with checkboxes followed by the Open and Closed fields that you can use to define the open and close timings for the point of interest.
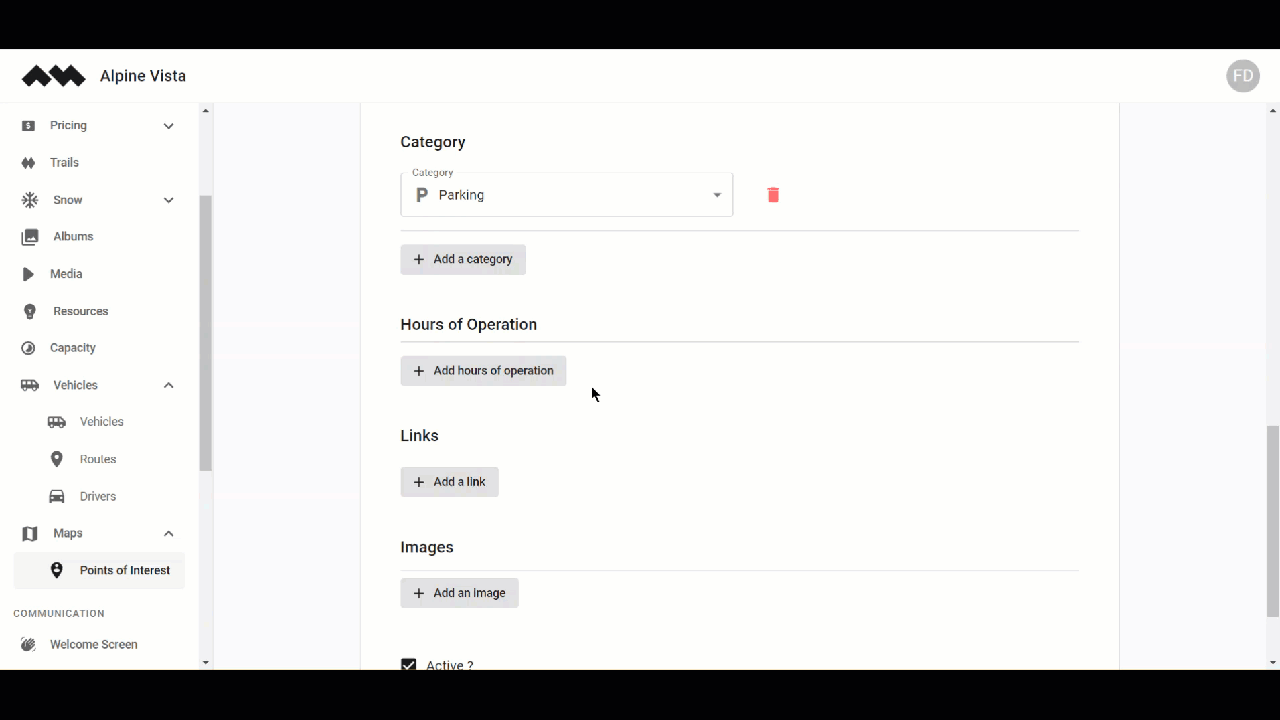
10. Click the +Add a Link button to add a link to the point of interest. This reveals the Title and Web Address fields that allow you to record the title and the website URL for the link.
11. Similarly, clicking the +Add an Image button displays the Drag & drop or select file button that you can use to drag and drop an image or choose one from your system storage.
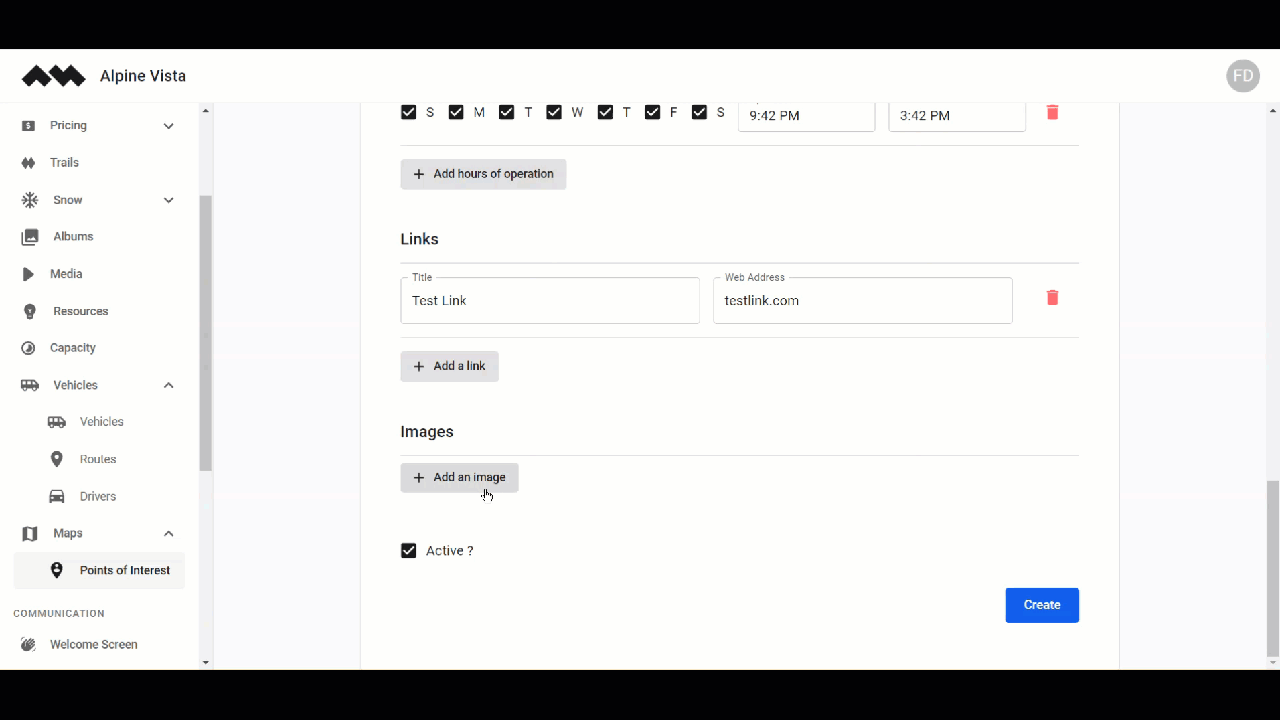
12. In case the point of interest is inactive, unmark the Active checkbox.
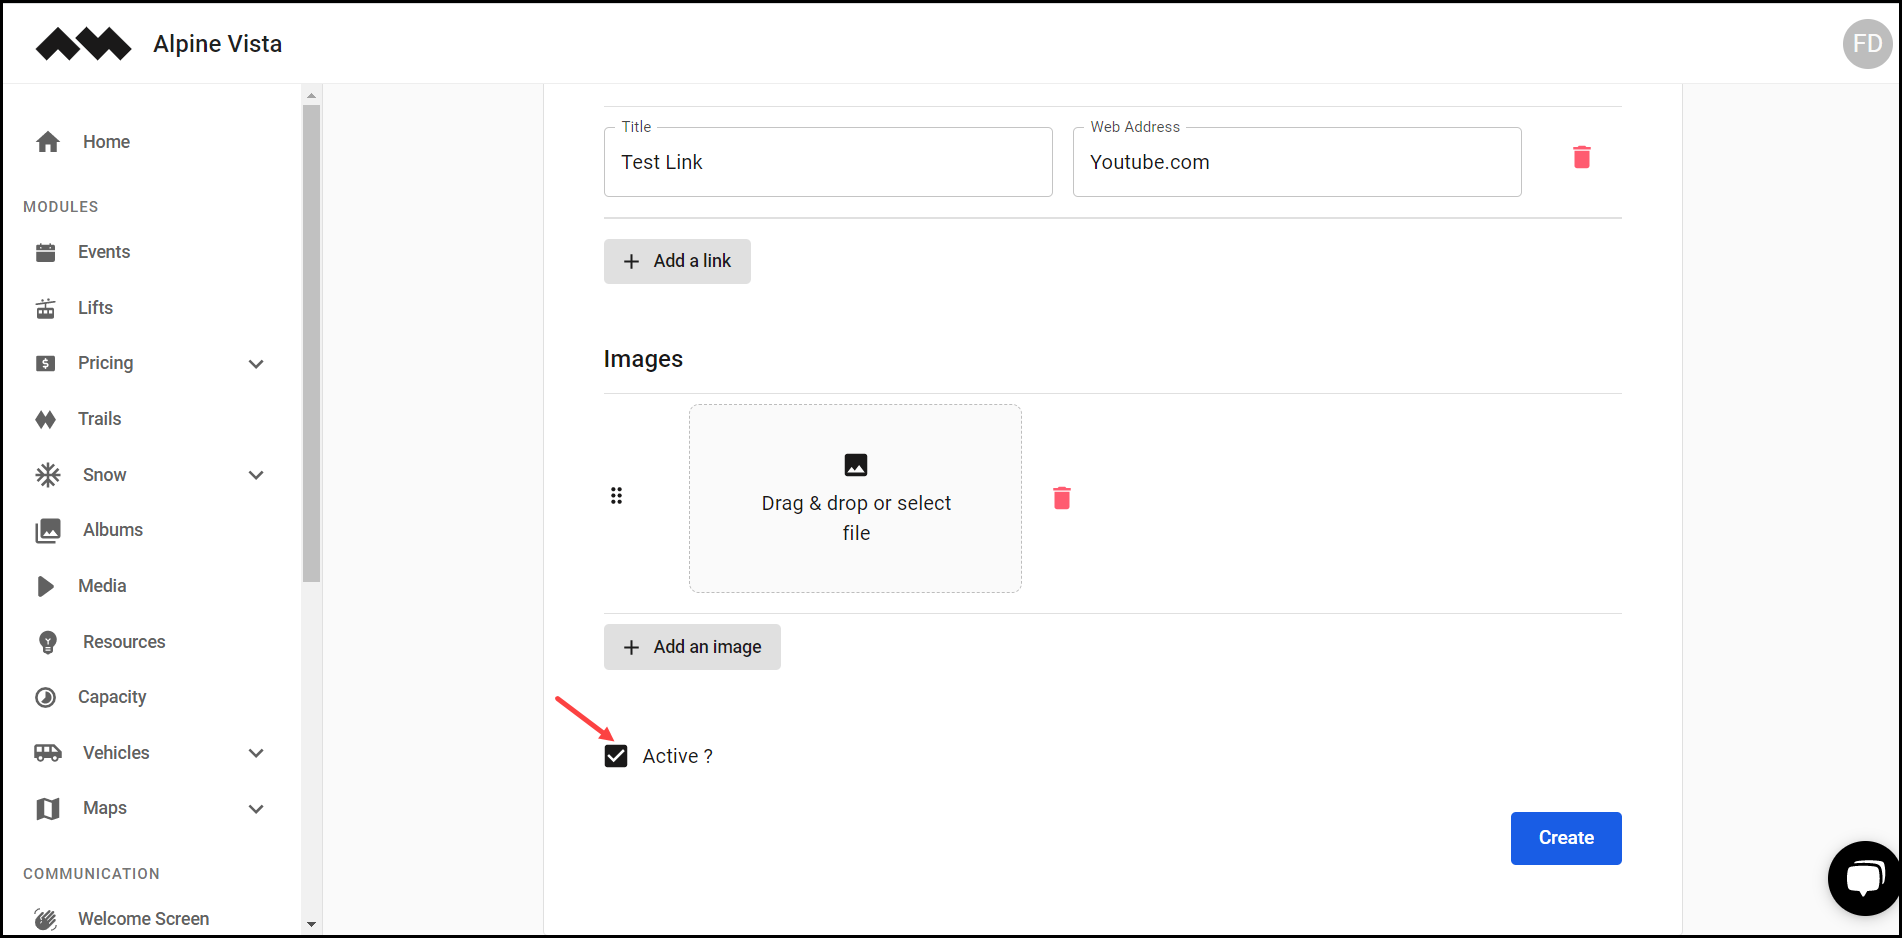
13. Once the required selections are made, click the Create button.
