How to Add a Route?
Learn how to add a route
[Organization Name] > Left Navigation Bar > Vehicles > Routes
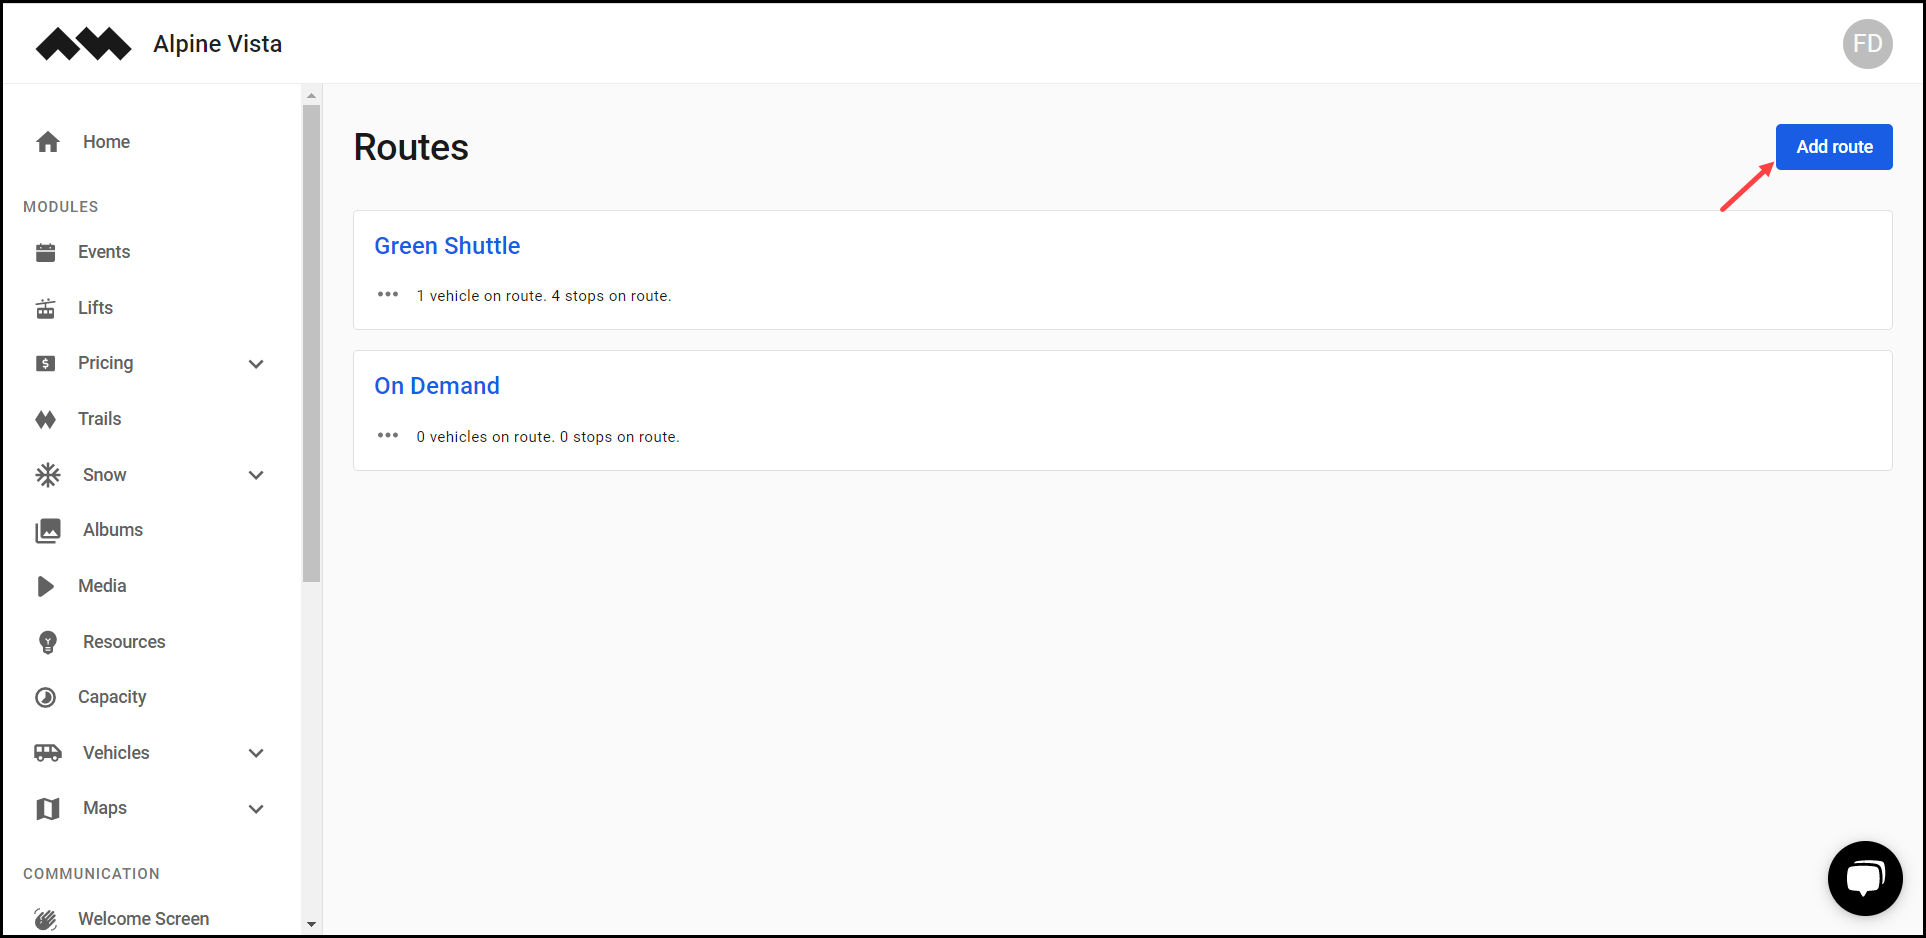
1. Follow the above-mentioned workflow to land on the Routes screen.
2. Click the Add route button. Doing so takes you to the New Route screen.
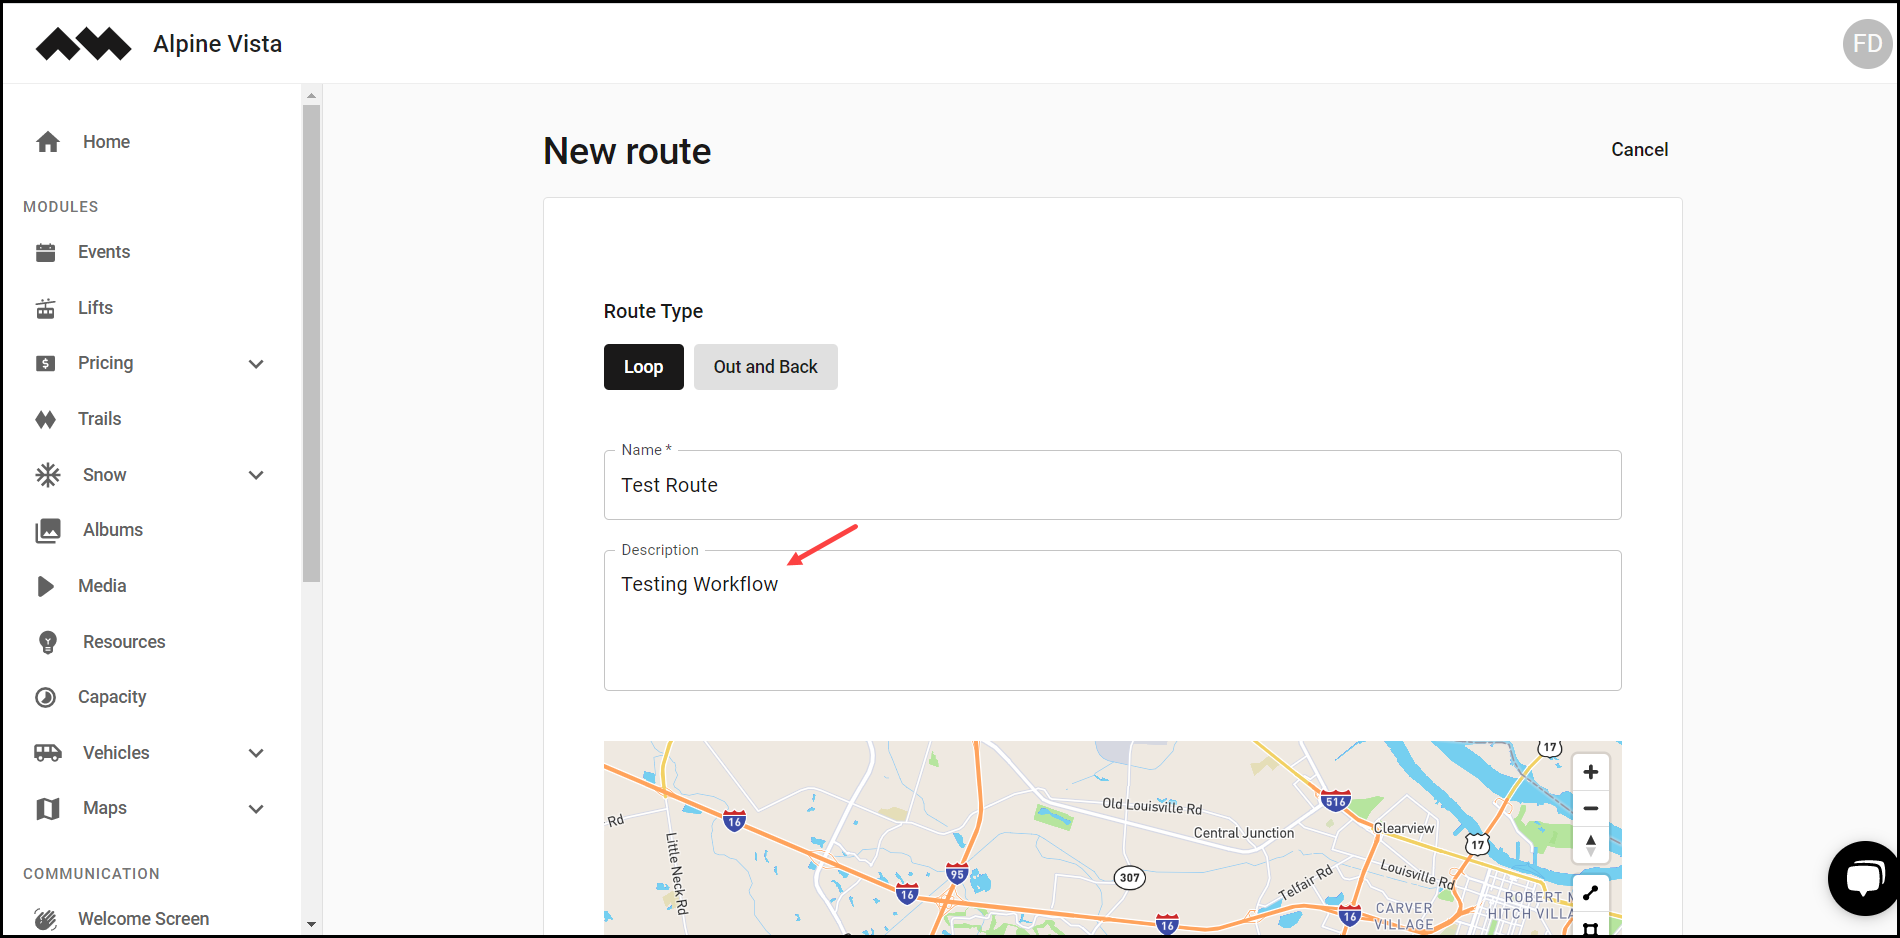
3. Here, select the type of route from the options available under the Route Type heading.

4. Enter the name of the route in the Name field.

5. Use the Description textbox to enter a description of the route.
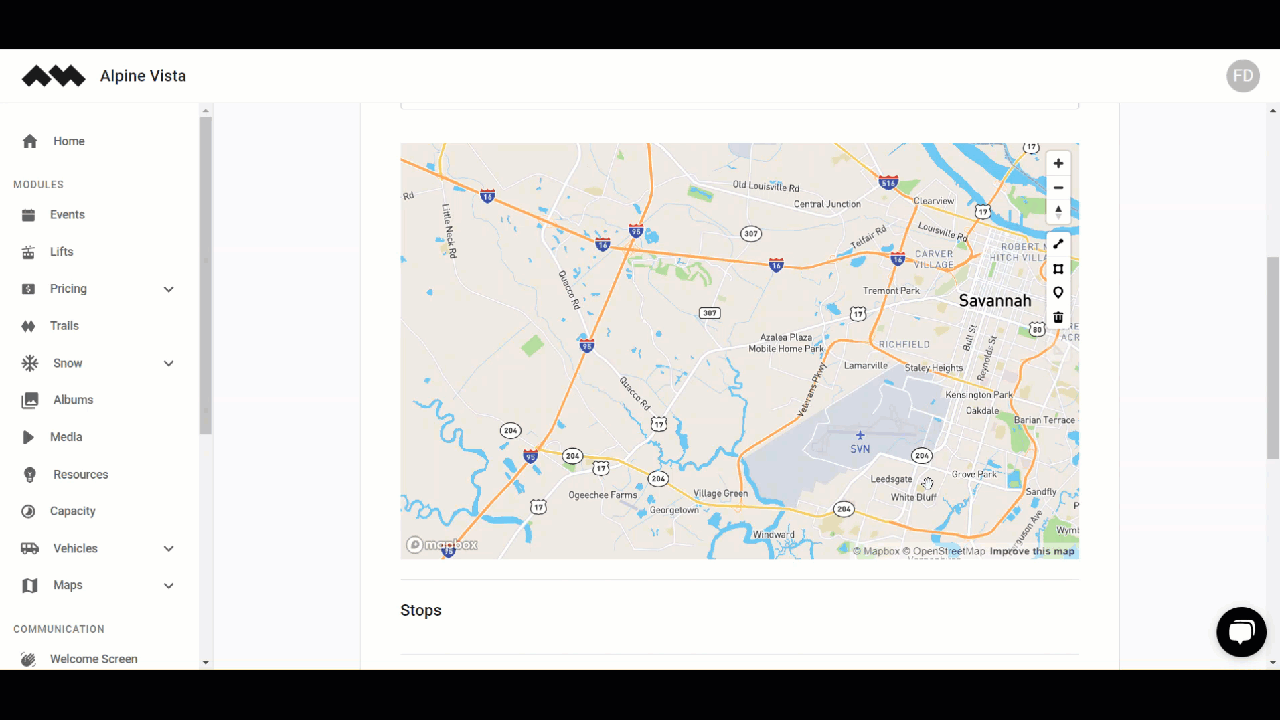
6. Use the tools on the map view to define the stop points of the route.
7. As points are marked, the Stop Name fields start appearing under the Stops heading. You can name the stop points using these fields.
8. Choose the display location for the route from the options displayed under Display Location.

9. Use the radio buttons displayed under Display Filtering to select the displays on which the route is shown.
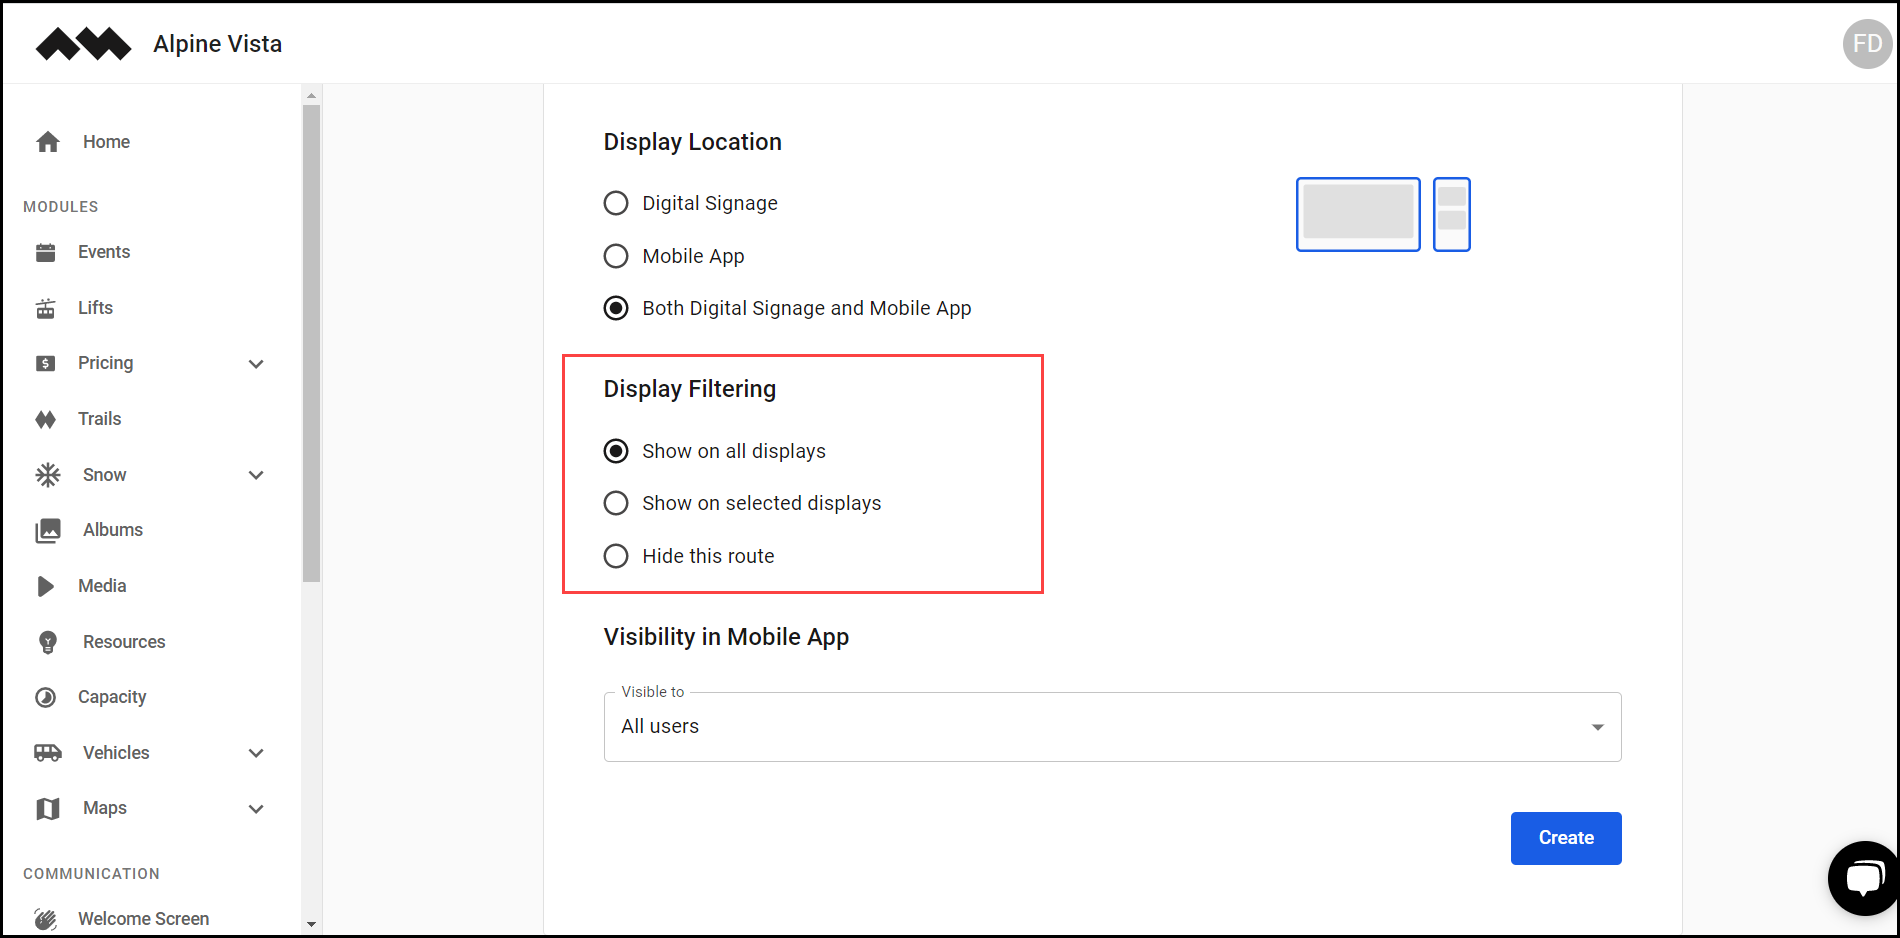
10. Use the Visible To dropdown to select who the route is visible to.
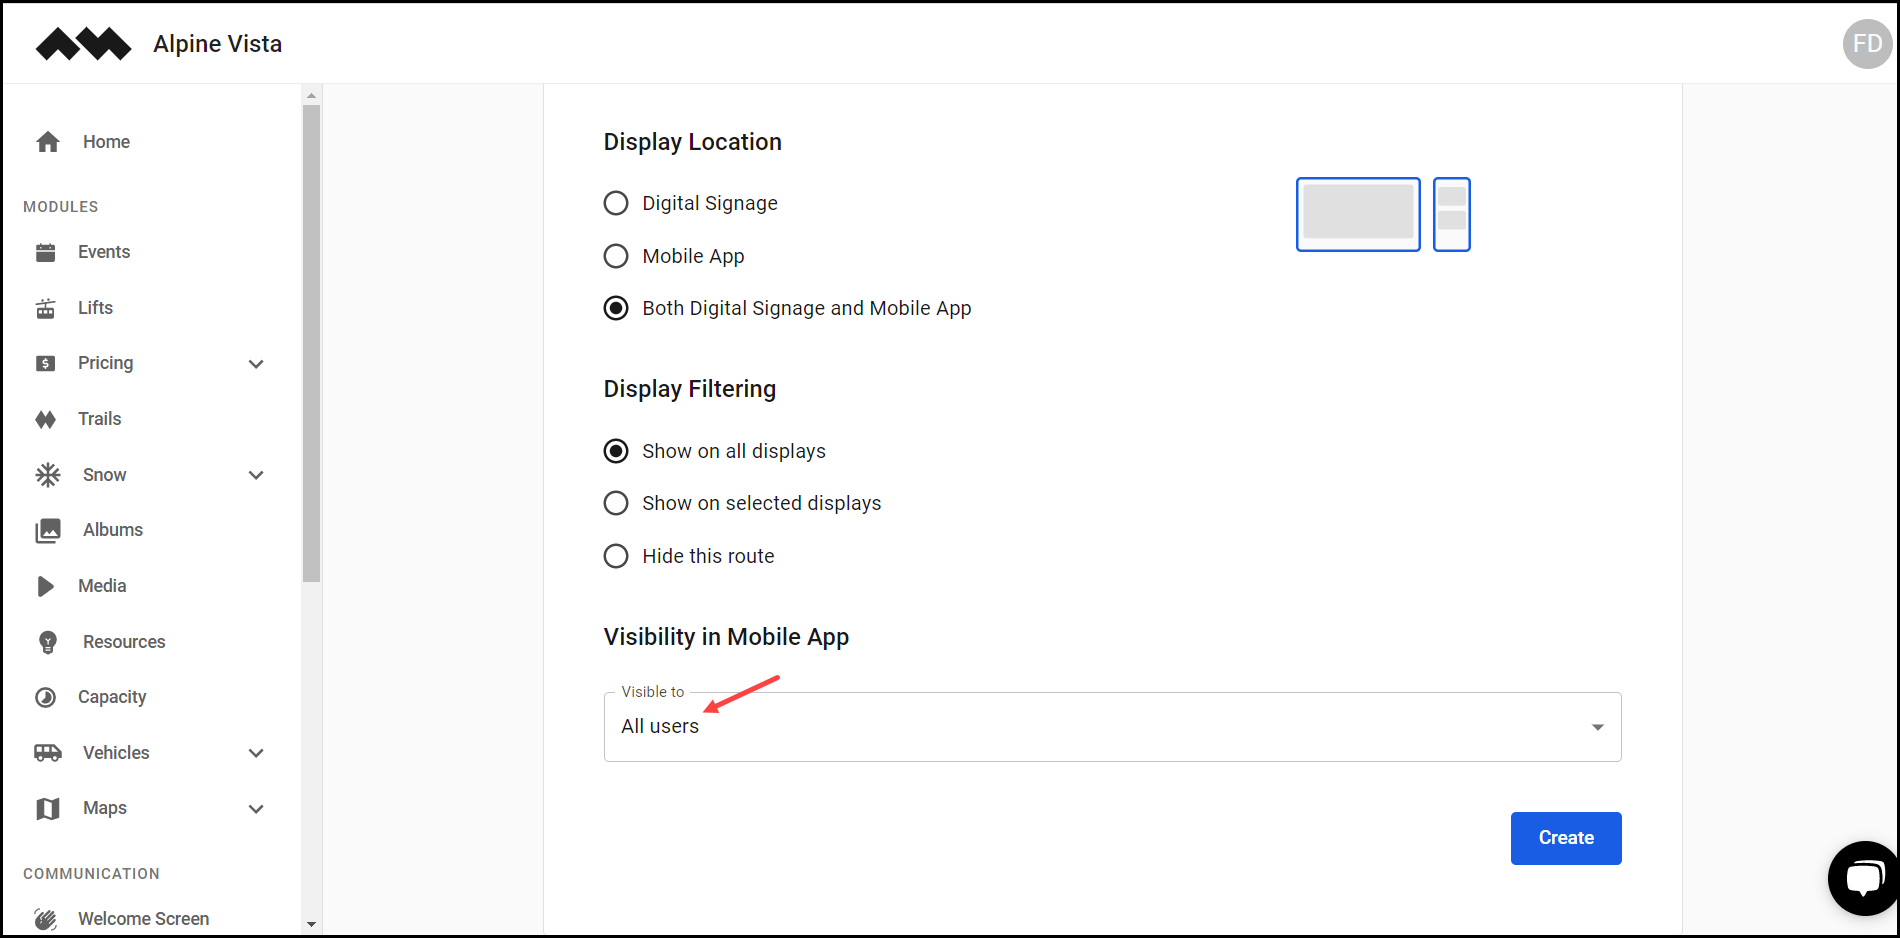
11. Once the required information is filled in, click the Create button.


